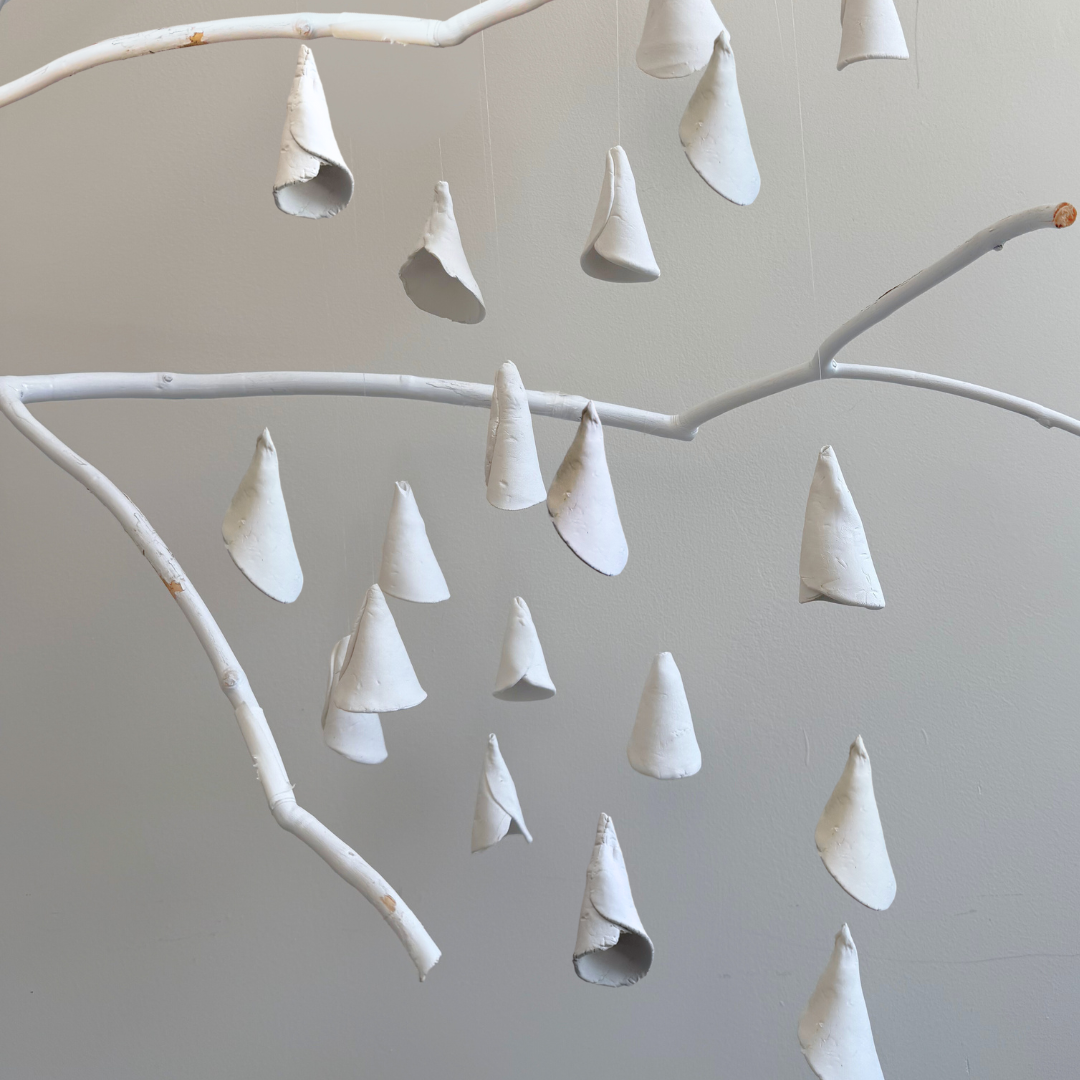
DIY Windchimes for a Biophilic Soundscape
Written by McKenzie Lunt and Audrey Nielson, Edited by McKenzie Lunt and Audrey Nielson
Incorporating sound into design is a powerful way to engage multiple senses and enhance the atmosphere of a space. Windchimes are a simple yet effective way to introduce a soundscape, transforming your environment with calming, melodic tones. In this DIY project, we’ll guide you through creating your own wind chimes, adding a personal touch to your multisensory design.
We’ve explored how these subtle sensory elements — especially sound — can change your body’s stress response without you even realizing.

Materials You'll Need:
Clay (for the windchime base)
String (a thick piece for strength and a thinner piece for the chime’s suspension)
Rolling pin
Bowls (for water)
A surface for rolling the clay
Utility knife
A drying space (such as a tray)
Step-by-Step Instructions:
1. Gather and Lay Out Materials
Before you begin, gather all the materials you'll need. Set up a clean workspace where you can roll out the clay and tie the strings without interruption.

2. Cut a Piece of Clay
Start by cutting a piece of clay into a small size. You’ll want to work with enough clay to form the base of the windchime, but not so much that it becomes difficult to shape.
3. Roll Out and Flatten the Clay
Using your rolling pin, gently roll out the clay on your work surface to form a small circle shape. The texture should be smooth and even, allowing you to form a uniform shape for the windchime base.
4. Tie a Large Piece of String, Then a Thin Piece into That String
Take the thicker string and tie it into a secure knot. Then, tie a thinner piece of string into the thicker one. Once both strings are tied together, cut off the ends. This will allow for an easy way to suspend your windchime and also create a more delicate, flowing sound when the chimes are struck.
5. Insert String into the Clay and Roll into a Cone Shape
Insert the knotted strings into the center of your clay towards the top and gently roll it into a cone shape. The cone should be large enough to create a subtle, resonant sound when it’s struck. By varying the size and angle of the cone, you can control the pitch and tone of your windchime, helping to enhance the soundscape in your space. Use water with your fingers to smooth out any rough parts on the clay.
6. Let It Dry
Once the windchime has taken shape, place it on a tray or flat surface to dry. Allow it to fully dry before hanging it. The drying time will depend on the thickness of the clay and the humidity in the air but give it at least 24 to 48 hours to harden completely.

7. Hang Your Windchime
After the windchime has dried, it’s time to hang it! Choose a spot where it can catch the breeze, such as near a window, porch, or balcony. As the wind flows through the chimes, it will create gentle, harmonious tones that add to the auditory landscape of your environment.
*For louder wind chimes, use kiln-fired clay.
Incorporating soundscapes into your multisensory design is a wonderful way to create an immersive environment. By making your own wind chimes, you can add a personal touch to your space while enhancing its auditory ambiance. The gentle sound of wind through the chimes will remind you of the beauty of nature, offering moments of tranquility throughout your day.
Incorporating carefully curated soundscapes into your multisensory design strategy is a profoundly effective method for crafting truly immersive and restorative environments. The subtle yet persistent influence of auditory elements can significantly impact mood, focus, and overall well-being, often on a subconscious level. Engaging with natural sounds, in particular, has been linked to stress reduction and a heightened sense of connection to the natural world.
We’ve seen this same principle applied in spaces designed for healing — where even the sound of a breeze can offer measurable emotional relief.
Constructing your own wind chimes offers a unique opportunity to personalize your immediate surroundings while actively cultivating a biophilic auditory ambiance. This hands-on approach allows for a high degree of customization, from the materials chosen to the specific tones and resonances produced. By selecting natural or reclaimed materials, you can further enhance the biophilic connection and imbue the chimes with a unique aesthetic appeal that complements your existing design.
Similar to other DIY projects we’ve featured, your choices here aren’t just aesthetic —they’re part of how your space supports your well-being.
The gentle and often unpredictable sounds generated by wind interacting with your handcrafted chimes serve as a constant, yet subtle, reminder of the dynamic beauty inherent in nature. This auditory connection can provide fleeting but valuable moments of tranquility throughout the day, fostering a sense of calm and grounding amidst the demands of daily life. The ever-changing patterns of sound created by the wind ensure that the auditory experience remains fresh and engaging, preventing habituation and continuously offering new nuances to appreciate. Consider strategically placing your windchimes in locations where the sound can be enjoyed both indoors and outdoors, perhaps near open windows or in garden areas, to maximize their restorative effects and seamlessly integrate the biophilic soundscape into your daily experience.


Related Articles

Does Your Home Support Your Mental Well-being?

Pet’s Role in Alleviating Mental Health Issues

Lime Paint’s Environmental Renaissance